How To Remove a Door Lock at Home
Whether you want to replace a lock altogether or you need to remove a lock to make a repair, removing a residential door lock is something you can easily do yourself. With the right tools in hand and clear instructions, removing a door lock is an easy DIY task. Read on to learn how to remove the knob, cylinder, and mortise locks.
Removing a Knob Door Lock (With or Without Visible Screws)
A knob door lock refers to a door turn-knob that has the lock built right in. Most commonly, these are found on interior doors within a home.
Sometimes, knob door locks will also be used (along with a deadbolt) for an exterior door, but they are not recommended as the primary lock for any exterior door due to how easily they can be removed or forced.
Tools Needed
To remove your knob door lock, you’ll need to start by making sure you have the right tools for the job:
- Wire or small nail
- Flat-head screwdriver
- Phillips-head screwdriver
Removing a Doorknob with Visible Screws
The first step is determining whether your doorknob has visible screws on the rose plate. If it does have exposed screws, these should be on the interior knob (the one you use to lock the door).
Step 1: Remove These Screws
If your doorknob has visible screws, your job will be easy. Grab the Phillips-head screwdriver and start unscrewing the two visible screws.
Step 2: Remove the Doorknobs
Once you’ve unscrewed those screws, you should be able to simply remove the interior and exterior doorknobs.
Step 3: Unscrew the Face Plate
Pick up the Phillips-head screwdriver again and start unscrewing the two screws located on the faceplate.
Step 4: Remove the Latch
Once you’ve removed the screws from the faceplate, simply grab the latch and pull the entire thing out.
Removing a Doorknob with No Visible Screws
Can’t find any visible screws on your doorknob?
Step 1: Locate the Slot
All knob locks have what’s known as a slot with a latch; this is what holds the knob in place. You can find the slot on the shank of the inside knob (the one you use to lock the door). This is usually a small, rectangular hole. If you don’t see the hole, try turning the knob to either side until you can locate it.
Step 2: Push Button and Remove Knob
Now that you’ve located the slot, you’ll need a flat-head screwdriver (or a small pin, paper clip, or nail) to press the release button inside of the slot (these tend to be very small). Push your chosen tool into the hole and depress the button. At this point, the interior knob should release from the door easily.
Step 3: Remove Exterior Rose Plate
Next, you’ll need to remove the rose plate. The best way to do this is to use a small, flat-head screwdriver to carefully pry the rose plate away from the door. Usually, there is a small slot on the rose plate that allows you to do this.
Step 4: Remove Interior Rose Plate
Now that you’ve removed the decorative rose plate, the interior rose plate (with screws) should be exposed. Pick up your Philips-head screwdriver once more and loosen these screws.
Step 5: Unscrew the Face Plate
Move on over to the faceplate now and unscrew that. Once completed, remove the latch altogether.
Step 6: Remove Remaining Doorknob
Finally, grab the remaining exterior doorknob and pull.
Read more about the Best Type of Lock for Your Door.
Removing a Cylinder Door Lock
Cylinder locks are extremely common and this type of lock is still relatively simple to remove. In just three quick steps, you can remove an existing cylinder lock for re-keying or replacement.
Tools Needed
To remove a cylinder lock, you’ll need just a few basic tools:
- Phillips-head screwdriver
- Flat-head screwdriver
- Allen wrench
Step 1: Remove Screws
Start by using your Phillips-head screwdriver to remove any visible screws from the interior side of the door. These are the screws that hold the lock and the door together.
Step 2: Remove the Spindle
Next, you’ll need to use your flat-head screwdriver to turn the spindle of the lock counter-clockwise around until it stops. This should be done by inserting the flat-head screwdriver (you may need to try a few different sizes) into the lock itself.
Once the spindle stops turning, you should find that the square tab within the spindle is perfectly aligned with the rest of the lock. At this point, you should be able to use your flat-head screwdriver to carefully push on the tab that’s holding the spindle into place. When you do this, the spindle itself will pop out of its housing.
Step 3: Take the Cylinder Out
With the spindle gone, you’ll now have access to the housing of the lock. Look carefully inside the housing (a flashlight might be helpful here) until you locate another small tab. Use your flat-head screwdriver to push down on this tab, which will release the cylinder. However, there’s a good chance that you’ll need to use an Allen wrench to push on the cylinder until it slides or pops out.
As you work on removing the cylinder, be careful not to press too hard with the screwdriver on the tab, as this can cause permanent damage to the point that the lock will no longer be usable.
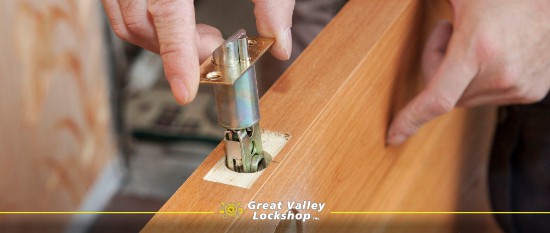
Removing a Mortise Lock
Mortise locks have a pocket (called a mortise) that is cut into the door itself. The lock is encased in this pocket, making it a more secure locking method.
Tools Needed
Removing a mortise lock requires:
- Phillips-head screwdriver
- Flat-head screwdriver
- A hammer may be needed
Step 1: Locate & Unscrew the Set Screw
This screw will be on the shank of the inside knob (the one you use to lock the door).
Step 2: Unscrew the Door Handles
The two door handles are screwed into each other through the spindle. Be sure to unscrew them; do not just pull.
Step 3: Remove the Rose Plates
Unscrew the external doorknob rose plate that remains on the door using a Philips-head screwdriver.
Step 4: Remove the Face Plate
Unscrew the top and bottom screws located on the faceplate of the mortise lock using a Phillips-head screwdriver.
Step 5: Remove the Mortise Lock
Using your hands or plyers, grab the latch bolt and begin to pull the mortise lock out. It should come out after a few, good pulls.
If the mortise lock can’t be easily removed, grab a large flat-head screwdriver and use that to pry it out. Insert the screwdriver into the hole where the spindle was. The screwdriver should fit snuggly in the hole. With your screwdriver perpendicular to the door, take a hammer and tap it in the direction of the strike place a few times.
There you have it: a few simple steps to removing a knob door lock, a cylinder door lock, and a mortise lock at your home. This is a basic DIY skill that any homeowner will benefit from knowing, especially if you ever need to replace a lock or have it re-keyed.
Get more expert advice: How to Repair Electronic Locks.
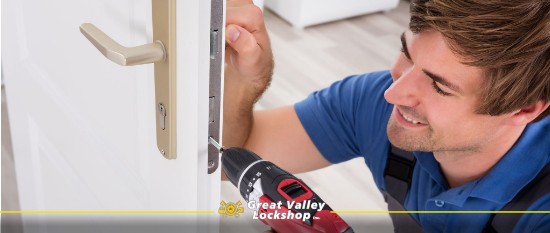
Residential Locksmith Services
Of course, if you run into any troubles while trying to remove a lock at your home, feel free to contact Great Valley Lockshop at 484-324-2986 or fill out a service request for assistance.
Editor’s Note: This post was originally published in February 2016 and has been completely updated for accuracy and comprehensiveness.