How to Replace the Lock Hardware on a Storm Door
If the handle is loose or the mortise lock is worn out and doesn’t lock anymore, it’s time to replace the hardware on your storm door. Here is a quick DIY guideline for replacing the mortise latch and lockset on a storm door.
What You Will Need to Replace the Storm Door Hardware
- new lock and hardware set
- Allen key
- wire cutters
- Phillips screwdriver or power screwdriver
- flathead screwdriver
- basic cleaning supplies
- tape measure
- pencil
- multi-tool
Steps for Replacing the Lock and Hardware on a Storm Door
Before you get started replacing the storm door hardware, take a careful look at your current hardware. You should measure and even take pictures of it to ensure that you purchase the right type when you go to the store and select the replacement.
Step 1: Loosen the set screw
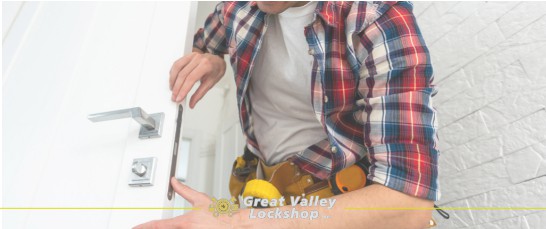
Using an Allen key, loosen the set screw and remove the interior door handle.
Step 2: Remove the screws and cover plates
Then use a Phillips screwdriver or power screwdriver to take out the screws on the cover plate. Continue on and remove the other screws keeping the handle hardware attached to the door.
Gently pull the interior and exterior handles and cover plate until they come free. You may need to jiggle them slightly to pull them completely apart. Keep a box or bowl nearby to place all the pieces and screws in as the hardware comes apart.
Step 3: Remove the lock body
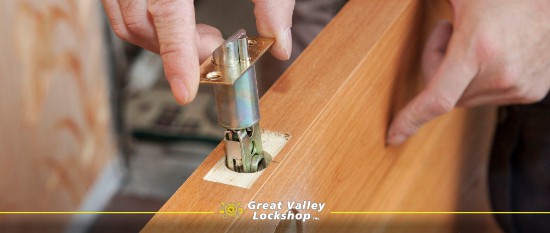
Remove the lock body from the storm door by pulling down from the top of the casing with your finger or the tip of a flat head screwdriver. If the lock body doesn’t pop out easily, you can also insert a screwdriver into the hole in the door and into the key mechanism to help pry it out.
Now would be a good time to clean the door to remove any dust or dirt that has collected around the old hardware and inside the door where the new lock will be installed. To clean out buildup from the hole where the mortise was, use a vacuum. Then, for the exterior part of the door where the handle hardware was, wiping with paper towel and a mild spray detergent should be sufficient.
Select a new mortise latch and hardware that you want to replace the old set with for your storm door. You can find a limited selection of door locks and handles at your local hardware store. Plus, you will find a nearly unlimited number of options online or at a doors and window store where they can order the style, color, metal and size required for your storm door.
Step 4: Place the new mortise lock
Once you have your new mortise lock and hardware in hand, it’s time to finally replace that old storm door lock and hardware. Take the new lock body and look for the label indicating the side that should face upward. Then, slide the lock body into the hole where the old one had been with the latch facing outward.
Using the proper screwdriver, fix the cover plate in place on the storm door with screws at the top and bottom of the plate. Screw them all the way in, but be sure not to overtighten them as this can cause the plate to bend and damage the lock or create unnecessary friction when opening and closing the storm door.
Step 5: Position the hardware properly
Then take the mortise lock, with the key hold toward the outside, and slide the post from the exterior side of the storm door into the proper space in the lock body. Position the hardware on the front of the door and hold it in place with one hand. With the other hand, slide the square spindle from the interior side of the storm door in through the lock so that it sticks out of the exterior side as well. This is where the exterior handle will be installed in the next step.
Before installing the exterior handle, locate the interior side hardware. If it has a pre-measured post that should extend into the door and lock body, you may have to cut it to the proper length based on the thickness of the door. Use a pair of wire cutters to clip off the extra length.
Step 6: Slide on the hardware
Slide on the hardware with the thumb latch. Position it on the interior side of the storm door. Use the appropriate length screws to fix it in place at the top and bottom of the hardware. Tighten the screws up using a screwdriver.
Step 7: Secure the handles
Place the plastic gaskets around the end of both handle pieces and insert one on either side of the square spindle. Secure the storm door handles to the rest of the hardware with an Allen key.
Step 8: Replace the strike plate
To replace the strike plate on the frame of the storm door, you’ll first need to undo the screws and remove the old plate. Measure the height of the latch and slide bolt on the new hardware with the tape measure. Next, mark the relative height on the frame with a pencil. If the hole in the door frame, called the box, doesn’t correspond to the new latch and bolt heights, you’ll want to cut out the obstruction with a multi-tool.
Line up the strike plate and use the screws provided with the hardware to fix it in place.
Step 9: Check your work
Check that storm door closes and locks properly.
Now your storm door has beautiful, new hardware and mortise lock. Good luck with your DIY project!
Here are more tips on how to master hurricane door protection.
Time to Replace Your Locks?
If the locks on your house need to be rekeyed or you’re concerned about security in your area, get expert advice for the best solution. Talk with the team at Great Valley Lockshop. We service a wide area including parts of Pennsylvania, Delaware, Maryland and New Jersey. Call us at 610-644-5334 or fill out our online request form to get in touch.


