Key Takeaways
1. A fire-rated door is designed to withstand fire for a specified time, usually, 20 to 90 minutes, slowing down the spread of flames and smoke.
2. Unlike standard doors, fire doors must be installed with exact gap tolerances, structural fasteners, certified hardware, fire-rated foam, and caulking. Every component must be compatible and listed, from the jamb to the closer.
3. Great Valley Lockshop has over 45 years of expertise in installing commercial doors. We handle everything from steel and wood fire door systems to ADA-compliant operators.
9 Key Steps To Properly Install a Fire Door
Installing a fire door is one of the most critical layers of protection between your family and a high-risk zone like the garage.
While conventional door installations focus primarily on basic functionality and aesthetics, fire doors are part of a regulated life safety system. Their installation demands strict adherence to the manufacturer’s instructions, code-defined tolerances, and the use of certified components.
This guide walks you through the process, breaking down each step with the why behind the what, so it’s not just functional but purposeful.
1. Know Why You’re Installing a Fire Door and Where
Let’s start with intent. Fire-rated doors are required when there’s a direct connection between a garage and a living space.
Garages contain flammable materials, vehicles, and tools that can spark a fire. The fire door buys you critical time, usually 20 to 30 minutes, to exit the home safely.
Fire doors are essential for commercial buildings because they serve as a critical line of defense against the rapid spread of fire and smoke, two of the biggest threats during an emergency. Here’s why they matter so much in these environments:
- Protects occupants by slowing the spread of fire and smoke, allowing more time to evacuate
- Ensures compliance with building codes, NFPA standards, and insurance requirements
- Safeguards valuable assets, inventory, and infrastructure from fire damage
- Keeps emergency exits and escape routes clear and passable during a fire
- Prevents toxic smoke from spreading quickly through high-traffic areas
Pro tip. Install fire doors between attached garages and mudrooms, basements, or staircases that connect directly to living areas.
Standard doors can be hollow-core, use decorative trim, and have flexible hardware options. Fire doors are heavy and solid and have strict component compatibility. You can’t mix and match parts.
2. Measure the Rough Opening
Most installation headaches start with poor measurements. A fire door is heavier and less forgiving than a standard interior door. You can’t just “shim it later” and hope it works.
- Start by measuring the rough opening’s height, width, and depth.
- Then, measure the fire door slab and jamb together. The difference between the two is your shim allowance.
- Divide the allowance evenly on both sides to ensure the door sits centered.
Let’s say your rough opening is 38 1/8″ wide, and your jamb is 37 5/8″, which gives you ½” or ¼” on each side. Shimming unevenly here will throw off the swing and leave you with a crooked install that no amount of trimming will fix.
Pro tip. Use a laser level or plumb bob to mark accurate vertical reference lines on both sides. These will guide your shim placement later.
Difference from a regular door. With interior doors, slight gaps or uneven margins can be filled or ignored. Fire doors must follow code-specified gap tolerances to maintain the rating.
3. Shim the Hinge Side First, and Take Your Time
This step is where precision pays off according to the manufacturer’s instructions. The hinge side of the door determines the swing, the seal, and the longevity of the door frame. If it’s even slightly out of plumb, you’ll either end up with a door that swings open on its own or rubs the jamb every time it closes.
- Place shims at each hinge location, like the top, middle, and bottom.
- Use your laser reference or plumb line to align the shims perfectly.
- Fine-tune each shim to make the hinge side perfectly vertical before setting the door in place.
Even a ⅛” error here can throw off the whole fit later.
Pro tip. Once aligned, lightly tack in screws to hold the shims in place without over-committing. This lets you make last-minute tweaks after the dry fit.
Difference from a regular door. You might fudge a little on a regular door to make it look flush with the wall. With a fire door, plumb trumps cosmetics. The fire rating can be compromised if the slab twists or the gap widens.
4. Dry Fit the Door Before You Do Anything Permanent
Before sealing or screwing anything in, stand the door up in the opening and check how everything aligns.
- Watch how it fits against the shims.
- Check to see if it touches the wall flush or if the wall bows (most do, especially in older homes).
- Look at the top gap. Check if it tapers and see if the latch side is tight.
You should diagnose these issues before locking the frame into place. This step allows you to adjust and prevent damage or stress.
Pro tip. Have someone help you. Fire doors are heavy, and you’ll need another set of hands to keep them steady.
Difference from a regular door. Most doors get standard construction foam or no insulation at all. Fire doors require UL-listed fire-stop materials to slow flame spread and reduce smoke migration.
5. Seal Beneath the Threshold With Fire-Rated Foam
This step is often overlooked, but it’s critical. If the gap between the door and the subfloor is left untreated, it will become a highway for air, heat, and fire.
- Use fire-rated expanding foam, not the regular kind from the hardware store.
- Apply it in a steady, even bead underneath the door sill.
- Let it expand and fill the space, then trim the excess later.
This preserves the door’s fire rating, and smoke seals the opening to improve energy efficiency and comfort inside the home.
Pro tip: Make sure the foam is UL-rated or meets your local building codes.
6. Install the Door and Anchor the Frame
Most homes are not perfectly square. Walls are often out of plumb, especially if you’re working in an older house or a remodeled space. Don’t try to force the door to match the wall.
- Align the door to your level and shim guides, not the drywall or studs.
- It’s more important that the fire door opens and closes cleanly than it is to match imperfect framing.
Pro tip. Once in place, double-check the plumb and level in both directions, hinge to latch, and top to bottom.
7. Secure the Frame With Screws
Once you’re confident in the fire door’s alignment, it’s time to lock it in.
- Start with the hinge side, driving long screws through the shims and into the framing.
- Then, secure the latch side, adjusting slightly to ensure an even gap between the door and the frame.
- Don’t overtighten screws; this can warp the frame and throw off the alignment.
Pro tip. As you fasten, keep checking the fire door swing. It should feel smooth, not tight or heavy. If the latch doesn’t line up or rubs, pause and adjust before moving on. Use 3″ screws for stability, especially for a heavy fire door.
8. Apply Fire-Rated Caulking Around the Frame
Now that the fire door is in, it’s time to seal it tight. Caulking involves applying a thick, paste-like material (usually from a tube) into joints or seams where two surfaces meet, in this case, where the door frame meets the surrounding wall or drywall.
- Use fire-rated caulk around the exterior of the jamb where it meets the wall or drywall.
- Fill all gaps, no matter how small; they’re potential points of failure in a fire.
- Smooth out the bead to create a clean, continuous seal.
Pro tip. This caulking ensures the entire assembly maintains its fire rating. Choose a caulk that matches your local building code requirements (intumescent, if required).
Difference from a regular door. This step is often skipped or done with painter’s caulk for looks. But here, caulking is part of your fire protection system. Without it, fire can creep through wall cavities even if the door holds.
9. Test the Swing and Do a Final Fit Check
Don’t skip this step, thinking you’re done. Open and close the door several times. Listen and feel for anything off:
- Does it swing freely without resistance?
- Does it latch securely?
- Is the reveal (gap around the door) even on all sides?
This is where you catch the small things before the tile is laid, the painting is done, and the inspector comes through.
Difference from a regular door. Most doors can be painted over and modified post-install. Without voiding certification, fire doors cannot be trimmed, altered, or painted over labels.
Factors To Consider When Installing a Fire-Rated Door
While installing the door, some main factors include checking for a certified fire rating and using a code-compliant closer. Let’s discuss the aspects in detail below:
- Certified fire rating. The fire door frame must have a visible, unaltered fire-resistance label from UL, WH, or another recognized authority.
- Listed door assembly. Only tested and approved components are used; the door slab, fire door frame, door hinges, and seals must match the rating.
- Tight tolerances. Maintain clearances of ≤1/8″ on top/sides and ≤3/4″ at the bottom to prevent smoke or flame penetration.
- Fire-rated sealing materials. Use UL-listed fire-resistant foam, mineral wool, or sealants for all gaps around the frame.
- Firestop caulking. Apply intumescent caulk between the frame and wall to maintain fire integrity at the perimeter.
- Structural fastening. Secure the frame with long, load-bearing screws, nails, or short drywall screws are not permitted.
- Self-closing mechanism. Install a code-compliant closer to ensure the fire door latches automatically after each use.
- Smoke/Intumescent Seals: Include approved perimeter gaskets or seals to block smoke and heat in early fire stages.
- Label visibility. Ensure the fire-rating label is exposed and legible post-install; painting over it voids the rating.
- No field modifications. Avoid trimming, drilling, or altering the fire door frame unless explicitly approved by the listing.
Great Valley Lockshop ensures all components are installed correctly, as intended, with no unauthorized alterations. This preserves your safety rating and helps you pass inspection the first time.
Types of Fire Doors
You can choose from different door types, starting with wood, steel, or lead-lined. Here is a small overview of what you can choose:
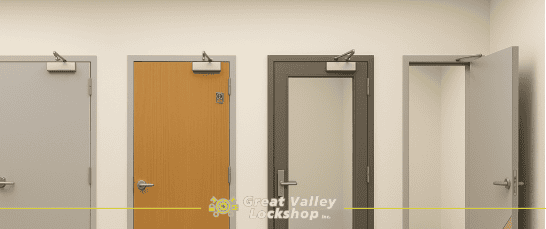
- Wood Fire Doors. Solid or engineered wood doors with a fire-rated core are commonly used in homes and offices.
- Steel Fire Doors. Durable, high-rating doors for industrial or commercial use, ideal for high-traffic or exterior areas.
- Glazed Fire Doors. Feature fire-rated glass panels for visibility and safety in offices and hospitals.
- Composite Fire Doors. Made from layered materials, lighter and more affordable, suited for internal use.
- Lead-Lined Fire Doors. Used in medical settings, offering both fire resistance and radiation protection.
- Smoke-Control Fire Doors. Designed with seals to block smoke and flames, critical in stairwells and escape routes.
Common Red Flags To Watch For During Fire Door Installation
Installing a fire-rated door involves a lot of easy-to-miss details that can quietly void the door’s fire rating or cause it to fail inspection. Here are some warning signs to keep an eye on during and after the installation process:
1. Missing or Painted-Over Label
Every fire-rated door must have a visible certification label, usually from UL, WH, or Intertek, on the hinge edge or top of the fire door.
For example, if you can’t find a label or it’s been painted while finishing work, you cannot verify the door’s fire rating and may fail inspection.
2. Improper Hardware Installed
Fire doors must use tested, listed hardware to withstand high heat and maintain door integrity during a fire.
For example, swapping in a decorative brass handle or a generic closer from a home store might look fine, but it completely voids the fire rating.
3. Gaps Exceeding Code Tolerances
Oversized gaps allow smoke and flames to bypass the door, undermining its purpose.
For example, a 1/4″ gap between the top of the fire door frame might seem minor, but it doubles the allowed clearance and compromises the seal.
4. Use of Standard Foam or Insulation
Only fire-rated expanding foam or mineral wool insulation is approved to fill voids around a fire-rated frame.
For example, if the installer used standard spray foam behind the jamb (common in non-rated doors successfully installed), it melts in a fire, leaving open paths for heat and smoke.
5. Missing Self-Closing Device
Most fire doors must close and latch automatically, especially in commercial and garage-entry scenarios.
For example, if the closer was removed to keep the door open for airflow or convenience, the fire door frame may not be shut when needed most.
Trust Great Valley Lockshop for Flawless Fire Door Installation That Passes Code—and Protects Lives
Installing a fire door isn’t just another home improvement project—it’s a critical safety measure that can save lives and protect property. From commercial buildings to residential garages, fire doors must be installed with surgical precision to ensure code compliance, preserve their fire rating, and function when it matters most.
At Great Valley Lockshop, we’ve spent over four decades installing fire-rated door systems the right way. Whether you need steel, wood, or ADA-compliant commercial doors, we handle every detail—from code-certified frames and fasteners to smoke seals and self-closing hardware—so you can avoid inspection headaches and stay protected.
Here’s what to do next:
- Verify whether your location requires a fire-rated door between specific spaces like a garage and living area, stairwells, or commercial fire zones.
- Check your existing door and frame for certification labels, proper gaps, listed hardware, and fire-rated seals to ensure they meet building code.
- Call Great Valley Lockshop to schedule a professional fire door installation or inspection. We’ll make sure it’s done right—the first time.
Contact Great Valley Lockshop for expert installation that meets code, enhances security, and reflects the standards your business deserves.