DIY: Restore the Locks on Your Older Home
Those original features in your home, like locks, should be adorned and saved! We’ll tell you how in just 15 DIY steps. Restoring your antique and colonial-style locks is a great way to spend this, or any, rainy weekend!
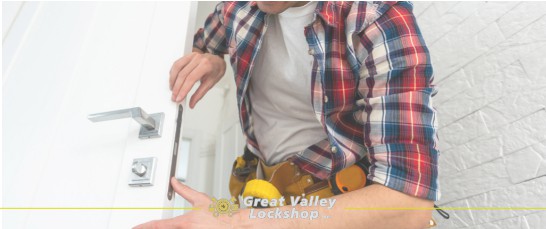
In older homes with original hardware, it’s not uncommon for the knobs to slip or the latches to stick. Restoring this hardware can maintain the charm of an older home. Follow these steps for taking the lock apart, cleaning the components and making some small repairs.
How to Restore an Old Mortise Lock
Here’s an overview of the process to clean and refurbish an antique mortise lock, commonly found with a thumb latch, in older homes.
1. Remove the Knob
Locate the set screw at the base of the knob on the inside of the door. Using a screwdriver, loosen the screw on the knob. While holding on the thumb latch and handle on the other side of the door, turn the knob slightly and free it from spindle. The spindle is the small rod that runs through the door and locking mechanism to connect the knob to the handle.
2. Remove the Spindle
Next, pull the handle and thumb latch from font of the door until the spindle is freed from the hole. If the spindle looks worn, a knowledgeable hardware store should have replacements in stock.
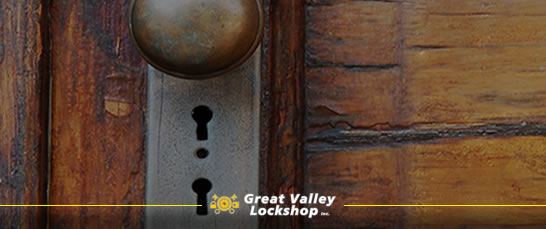
3. Clean the Lock Face
Older homes have layers of history that is often exhibited in their many layers of paint. Using a precision knife or blade, score the gap between the locking mechanism and the door. This will help free the hardware and remove any paint that may peel off the wood when the lock is removed.
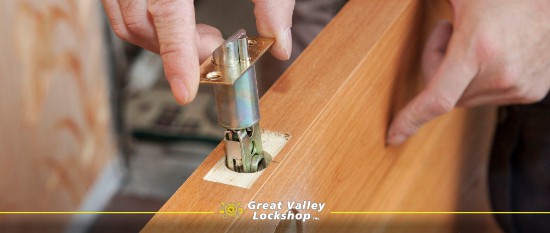
4. Remove the Lock Case
Then, unscrew the two screws in the lock face. If the lock case doesn’t immediately become loose, don’t pry it from the door with a screwdriver as you may scratch the hardware or the door itself. Use a smaller screwdriver placed inside the spindle hole to lightly lever the lock body out of the door.
5. Open the Lock Case
Set the lock body on a clean table with plenty of workspace. Be very careful when unscrewing the lock case because some components may spring out. Hold the case together with one hand while slowly removing the screw with the other.
6. Take a Picture
Many antique mortise locks and hardware are handmade, one-of-kind pieces. You may not be able to find an accurate diagram to help reassemble it. Before touching anything, take a picture of the inside of the lock mechanism. This will be handy when it’s time to put the pieces back together. As you go through the next steps, be sure to keep track of all the parts and little pieces.
7. Disassemble the Lock Components
Now, you can take apart the latch and deadbolt mechanisms. Press the gate of the deadbolt up towards the top of the lock and over the disk. Then, gradually release the tension in the spring until you can remove the gate from the pin.
8. Clean the Lock Face
Place the lock case into a vice with the face outside of its grip. Tighten the vice enough to immobilize the lock but not so much that it could dent the casing. Then, use super fine steel wool to clean buildup and paint from the lock face.
9. Restore the Lock Case & Components
Vacuum the dust from the inside of the lock case. Wipe off all of the parts; first with clean paper towel, then using a paper towel sprayed with a penetrating oil, such as WD-40.
10. Polish the Thumb Latch
To restore the thumb latch and other exterior hardware to their original shine, you’ll want to use super fine steel wool again to buff each piece. To thoroughly clean doorknobs, hinges and handles you’ll want to follow special cleaning instructions based on the type of metal the hardware is made.
11. Assemble the Lock
Reverse the steps as you put the deadbolt and latch mechanism.
12. Replace the Latch Spring
Replacing the latch spring, even if it’s not yet broken, will keep the lock working securely. Your local locksmith can help you find the right spring measure. You can use a screwdriver to put the latch spring back in tension.
13. Close the Lock Case
Continue to hold the lock components in place with the screwdriver as you position the side of the lock body and screw it back closed. Don’t tighten the lock case screw too much because it could block the components. Once you release both screwdrivers, the latch should release.
14. Test the Lock
Before putting the lock back into the door, test the lock and the deadbolt.
15. Reinstall
If the lock body doesn’t slide easily into position, you can use a rubber mallet to lightly push it into the door. Return the screws to the lock face and tighten them.
Replacing the Key or Fixing an Antique Lock
Chester County is rich with older homes full of history, antiques and craftsmanship. If you’re in the process of restoring an older home in Pennsylvania, Delaware, New Jersey or Maryland, we can help.
Original hardware made by locksmiths from decades ago may have jammed or worn out parts. Great Valley Lockshop can repair an antique lock or fit it with a new set of keys. Call us at (610) 644-5334 or request a free estimate using our easy online form.